
Use two separate temple anchors when short layers cannot meet at the back. Try a small central connection only when both sides reach comfortably. Leave enough hair loose to preserve the bob's lower edge, especially if most fullness sits in the upper layers.
Three half-up hairstyles for short hair and bobs
Hold a small section near each temple and guide it backwards without fastening. Where the ends rest tells you which structure is available. They may overlap at the back, stop near the ears, or reach only a nearby clip. None of those outcomes disqualifies the style; they simply change where the connection belongs.
Before closing the clip or tie, inspect the hair left loose below. On a layered bob, gathering a broad upper panel can remove the fullness that gives the lower shape its character. Release some side hair if the bottom becomes a thin fringe of ends. Start small and expand only when you prefer the resulting outline.
Preserve enough hair in the bottom outline
Before securing anything, hold the proposed top section in your hand and look at the hair left around your neck. If it becomes a narrow fringe of ends, take less from the sides. This matters especially with layered bobs, where the apparent fullness may sit mainly in the upper sections. Your half-up can be a small central panel or two front pieces rather than a full ear-to-ear division.
Look from the side as well as the front. A large top knot on a short bob can be a fun choice, but it changes the proportions more than a small pinned section. Decide whether that contrast is what you want. For a quieter result, keep the fastening close to the head and allow the loose hair to form a continuous line around the nape.
Try a small temple-to-temple connection
Gather a modest section near each temple, leaving the part and any fringe in place. Bring the pieces towards one another at the back and see whether they overlap. If they do, secure them with a small tie or an appropriately sized barrette. If they only touch at their tips, move the connection forward or choose two separate clips rather than forcing a single central fastening.
This arrangement is useful when you want the front open but like the crown to stay low. Keep your fingers underneath the sections while securing them so they do not become a rigid line across the sides. Aveda's short wedding-hair guide includes a half-twist approach, showing how a partial arrangement can create an occasion style without gathering the whole haircut.
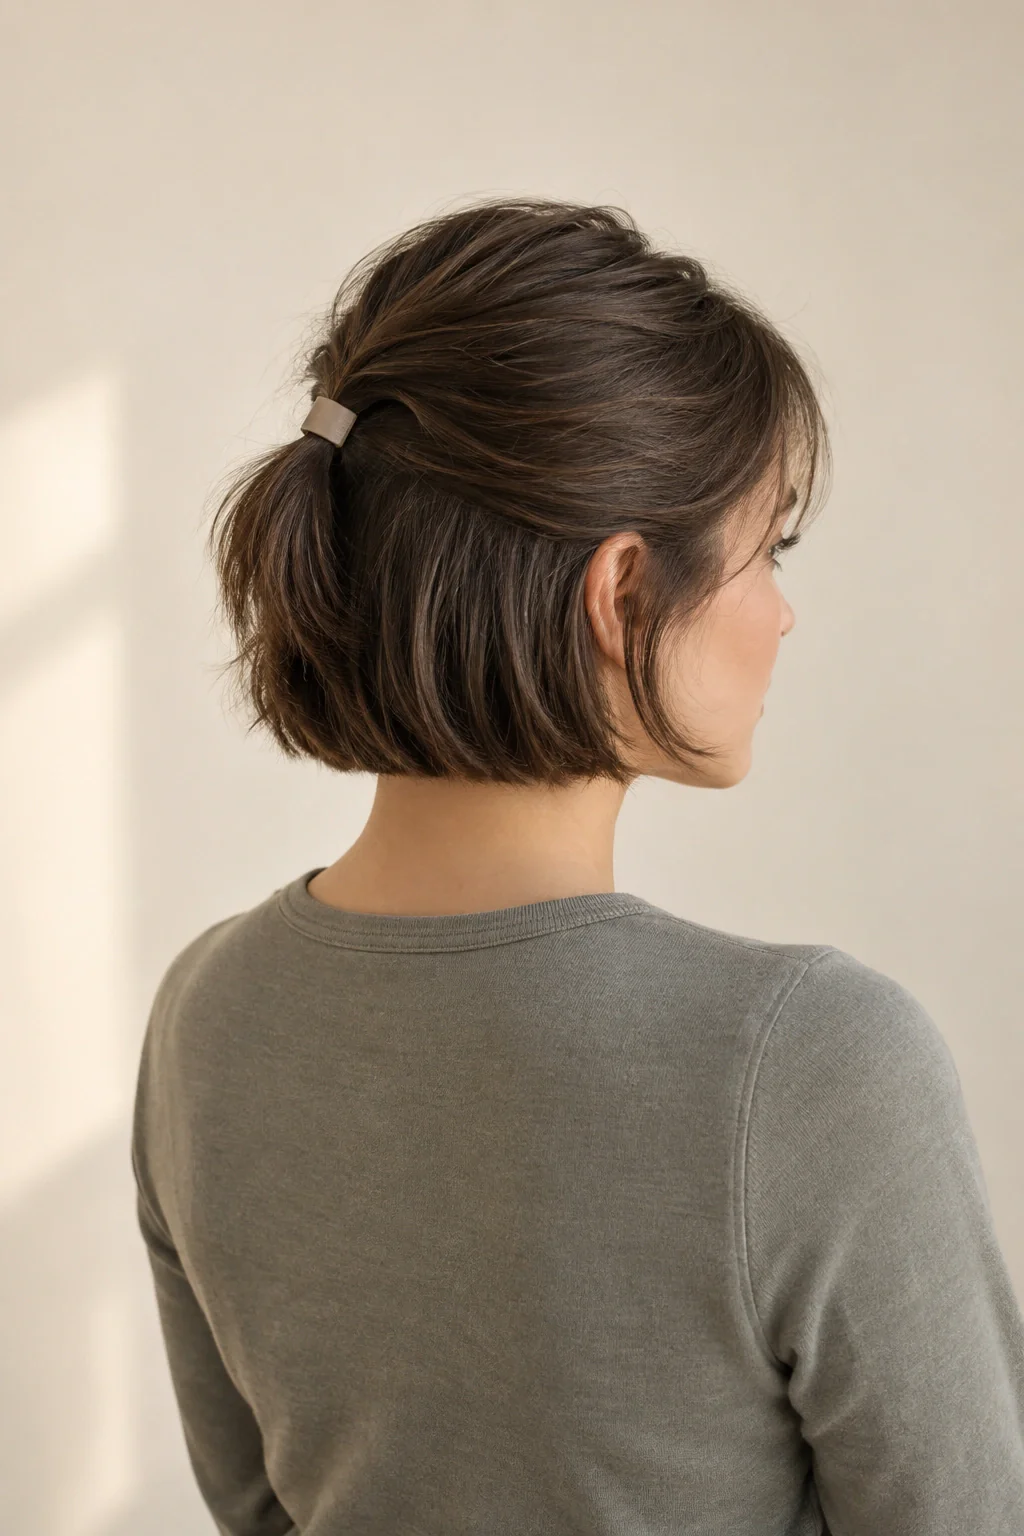
Make a miniature top section feel intentional
For a more playful shape, isolate a small section above the forehead and crown, leaving the sides mostly loose. Hold it where you would like the lift to appear. A very short ponytail can sit upright or fan backwards; it does not need enough length to wrap into a bun. Use a tie that closes comfortably without requiring repeated winding around a tiny group of ends.
If the ponytail points in a direction you dislike, lower the anchor or switch to a clip that lays the section back. Do not add a large quantity of product in an attempt to disguise the haircut's natural movement. Instead, treat the end shape as part of the design. A small fan can look cheerful, while a flat pinned finish gives the same open front a calmer mood.
Work around the shortest pieces
The small hairs above the ears often decide whether a short half-up stays tidy. Rather than catching them in the main section, let them form a soft side line or hold each with its own discreet clip. A longer face-framing piece can remain loose if it helps connect the gathered top to the lower outline. A few chosen loose sections are easier to manage than an accidental scatter.
For a growing-out fringe, try a narrow twist on one side before creating the main anchor. That gives the shorter pieces a closer destination. With curls, work with the curl group as it sits rather than stretching individual strands towards the tie. If a group will not reach comfortably, leave it in the loose part and change the half-up boundary around it.
Choose an accessory in scale with the style
A small hairstyle can carry a noticeable accessory, but the fastening still needs to match the hair beneath it. A broad bow on a lightweight clip may work well; a heavy metal ornament on a tiny ponytail may tilt or pull. Test the actual piece, not just its appearance. Put it in, release your hands, and check whether it remains at the angle you intended.
Consider how the accessory appears from the front. A bright tie that is barely visible can add a quiet detail; a tall claw clip becomes part of the silhouette. If your outfit already includes prominent earrings or a patterned collar, a plain clip may give those details room. For a simple T-shirt, a sculptural clip can be the styling feature. Neither choice requires hiding the mechanics.
Switch the mood without rebuilding everything
Once you have a comfortable half-up structure, change one detail to create a different finish. For an easy daytime version, keep your normal texture and leave the fastening visible. For an evening version, refine the part and choose a clip with a shape or finish that relates to your jewelry. For a softer version, loosen the surface slightly with your fingers while holding the anchor still.
Keep the bottom section consistent while comparing those options. If you change the texture, accessory, part and section size together, it becomes difficult to identify what made the style work. Photograph the same angle with two alternatives. You may find that an ordinary small clip gives the right balance and that the dramatic accessory is better placed at the side on another day.
Read the back view: three common half-up problems
If the back looks divided into an upper cap and a thin lower strip, the top section is probably too broad for the shape you want. Release hair from the sides first and remake a narrower connection. You may only need the two front pieces to open the face; collecting the whole upper half can remove the bob line you liked.
If the fastening holds only the tips, move it forward or split the connection into two anchors. Pulling the pieces harder towards the center does not create more length. If the mini ponytail points straight up when you wanted a quiet finish, lower the anchor slightly or use a flat clip to guide the section backwards. An upright fan is also a complete style when that is the shape you want.
Finally, put on the collar or hood you plan to wear. A clip close to the nape may be pushed upwards by the fabric. Reposition it where the layers still reach, or keep the connection near the temples. Check that you can turn and look down without releasing the front. Save a rear photograph of the version that works, since that fastening position is the detail a front selfie usually fails to record.
Choose the half-up by the view you want to preserve
With shorter hair, gathering more of the upper section can change the lower outline noticeably. Take a front photograph of your usual style, then make a very small half-up and photograph it from the same distance. Compare the shape around the jaw and shoulders before adding more hair to the gathering. You may prefer the first version precisely because it clears the front while leaving enough of the original outline visible. A half-up does not need to collect a predetermined amount of hair to count as intentional.
Next, check the back view and identify the detail that makes the gathering readable: the fastening, a small twist or a clear connection between the sides. If the shape looks uncertain from behind, adjust that organizing detail rather than automatically enlarging the section. The useful balance is between front openness and a back arrangement you understand. Name the part you want to preserve so future adjustments do not gradually remove the very outline that made your shorter haircut feel good to wear.
Troubleshoot one side that cannot reach the other
If a shorter side repeatedly slips from a central fastening, stop treating both sides as equal units. Try anchoring each side separately or moving the connection toward the side with less reach. Compare the result with a deliberately asymmetric version in which only one front section is held. These options change the design rather than forcing an uncomfortable connection. The right choice depends on which view you enjoy and whether the fastenings remain accessible when you make the style yourself.
Photograph the successful placement from the back and add a note about the section boundaries. On the next attempt, use those landmarks instead of trying to reproduce an exact measurement. If small ends remain visible, decide whether they belong to the texture of the finished style or whether you prefer another arrangement. Do not keep adding pressure to make a short piece behave like a longer one. A smaller, clearly organized half-up can communicate the intended mood while respecting the reach and shape your hair actually has.
Your questions, considered.
How short can hair be for a half-up style?
There is no single length that guarantees it. The deciding factor is whether a useful top or temple section reaches an anchor comfortably. A short crop may allow a pinned front section, while a bob may allow a small ponytail. Start with the available reach rather than the haircut label.
Why does my half-up make the bottom look thin?
You may be gathering the layers that provide most of the visible fullness. Reduce the width of the top section or collect only the temples. Check the lower outline before fastening so you can keep enough hair loose around the back and sides.
Do I need to curl a bob before putting it half up?
No. A half-up can work with the straight, wavy, curly or coily finish already present. Styling the lower section is a separate choice. Try the structure first; then decide whether the loose ends need any adjustment for the particular look you want.
Sources & what they support
The notes below explain the scope of each source. Hairstyle selections, outfit combinations and comparison exercises are HairSparks’s editorial suggestions; the links do not imply endorsement.
- Aveda: Three wedding-day styles for short hair ↗Professional examples of braids, half twists and sectioned occasion styles on shorter hair. These show possibilities, not a guarantee that every length can use the same fastening.
HairSparks and Hair Muse share the same publisher. App mentions are promotional. Read our editorial policy.