
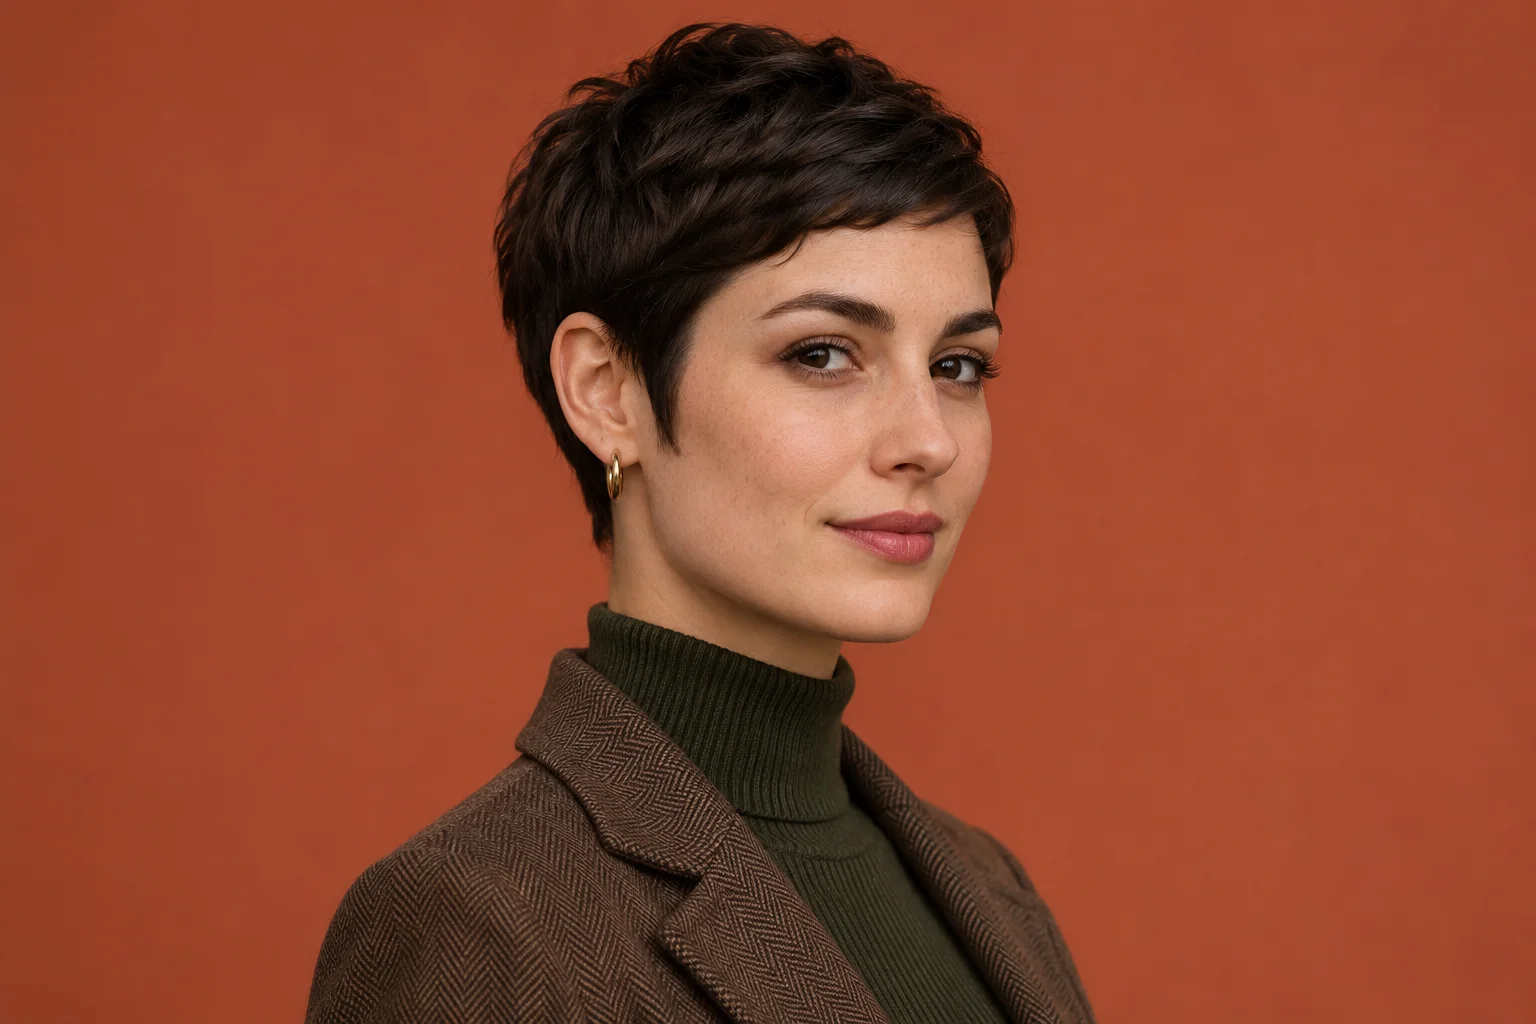
The easiest way to choose pixie cut sideburns is to decide how much of your ear you want to see, then look at where the hair in front of it ends. A short outline opens up the ear. A tapered point leaves a little framing in front of it. A longer side section can give you enough hair to tuck, provided the section reaches behind the ear and stays there in your usual style.
Start by choosing the version you would want to wear on an ordinary day. Try on a few broad short-hair shapes on the same selfie, then use side photographs and a mirror check for the exact contour. Take one preferred side shape and one slightly longer option to the salon. That gives your stylist room to account for the way your hair actually grows.
Compare three shapes for pixie cut sideburns
For a clean, open ear, ask to see the upper rim of the ear and keep the front piece short. This can leave space for a small earring to show and gives the outline a clear break where the hair meets the ear. From the side, decide whether you like a smooth arc that follows the top of the ear or a less exact edge with a few short hairs sitting over it. If you usually sweep the top forward, check how that movement ends at the temple.
For a soft point, leave a narrow section in front of the ear and let its ends taper. Try pointing near the top of the ear first, then halfway down. Those are visual references you can point to, and the stylist can adjust them for your hairline. A taper with a few ends of different lengths looks softer than a dense section with a straight end. Ask to keep enough weight at the base if you want the point to remain visible from the front.
For a longer side, check whether the piece you plan to tuck can actually reach behind the upper ear and stay there after you let go. It may need more length than you first expect if the hair springs forward or the ear sits slightly away from the head. Ask how it will look when left loose as well. A piece long enough to tuck can sit against the cheek when you wear it forward, so both positions are part of the decision.
Good Salon Guide on pixie detailing
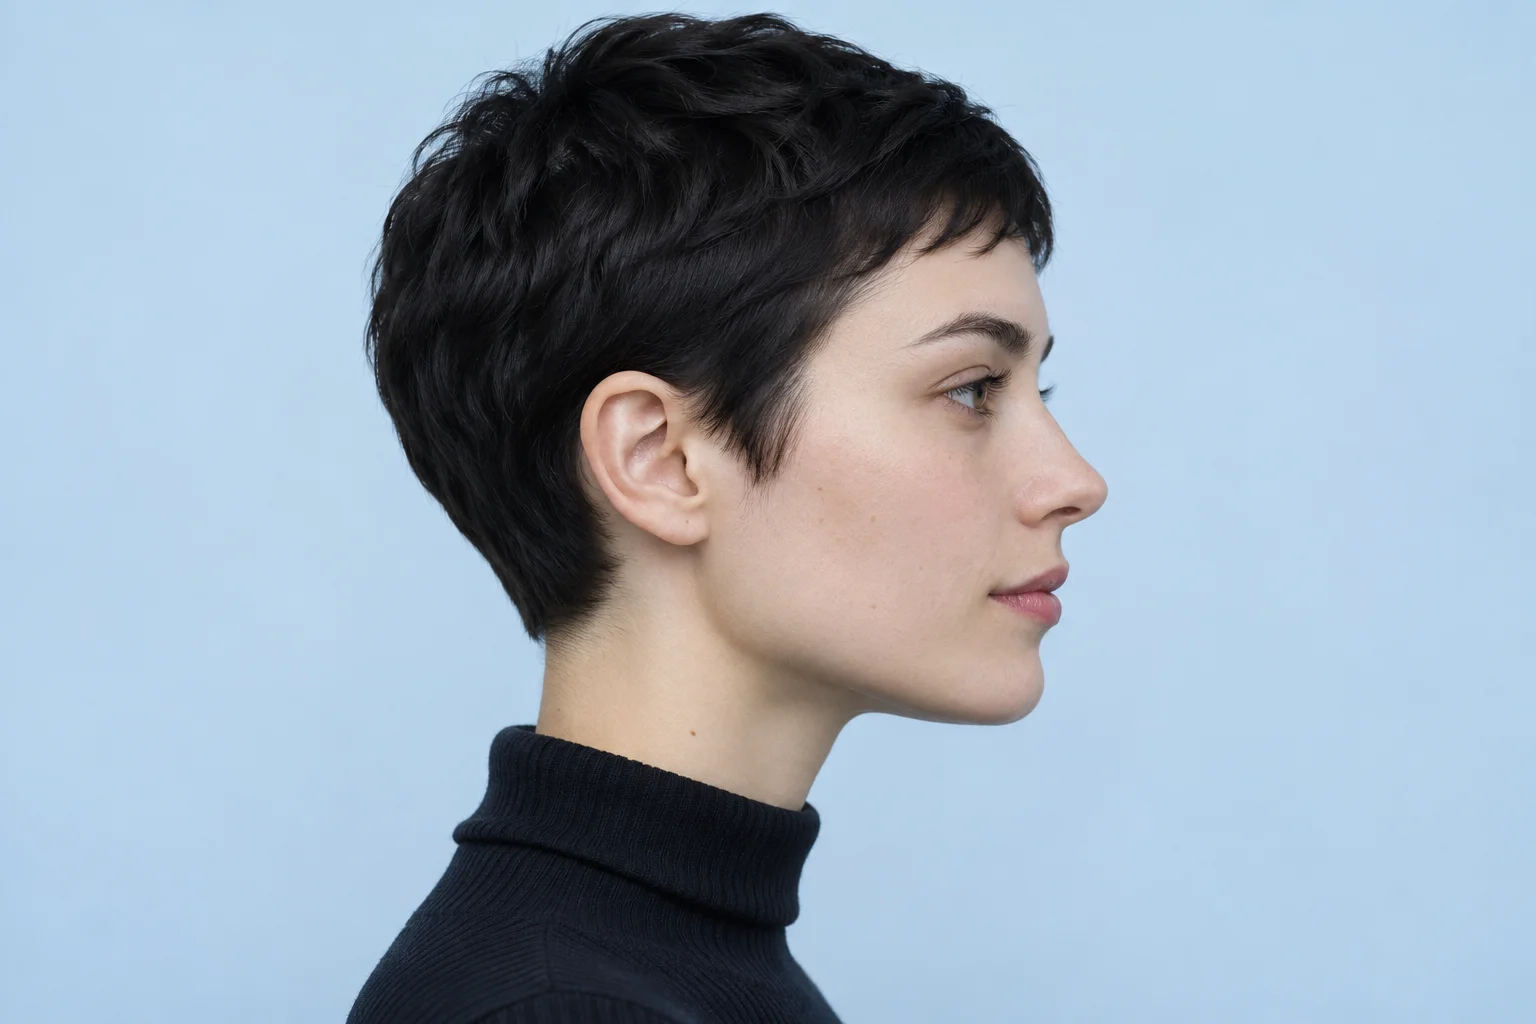
Separate the ear opening from the top of the cut
Two pixies can have very similar tops and completely different outlines around the ears. Choose a front or three-quarter image that you like for the shape above the temples, then find a profile with the amount of ear you want to see. Look at those features separately. A cropped reference with a neat outline may have more crown height than you want. You can still use its profile to explain how the side should finish.
Look closely at the little corner directly in front of the ear. Is the skin visible between the tip of the sideburn and the cheek, or does a fuller section soften that transition? Then follow the hair behind the ear to the nape. You might prefer a tidy ear with a loose, softer nape. A single photo can suggest several choices at once, so point to the areas that matter when showing it to your stylist.
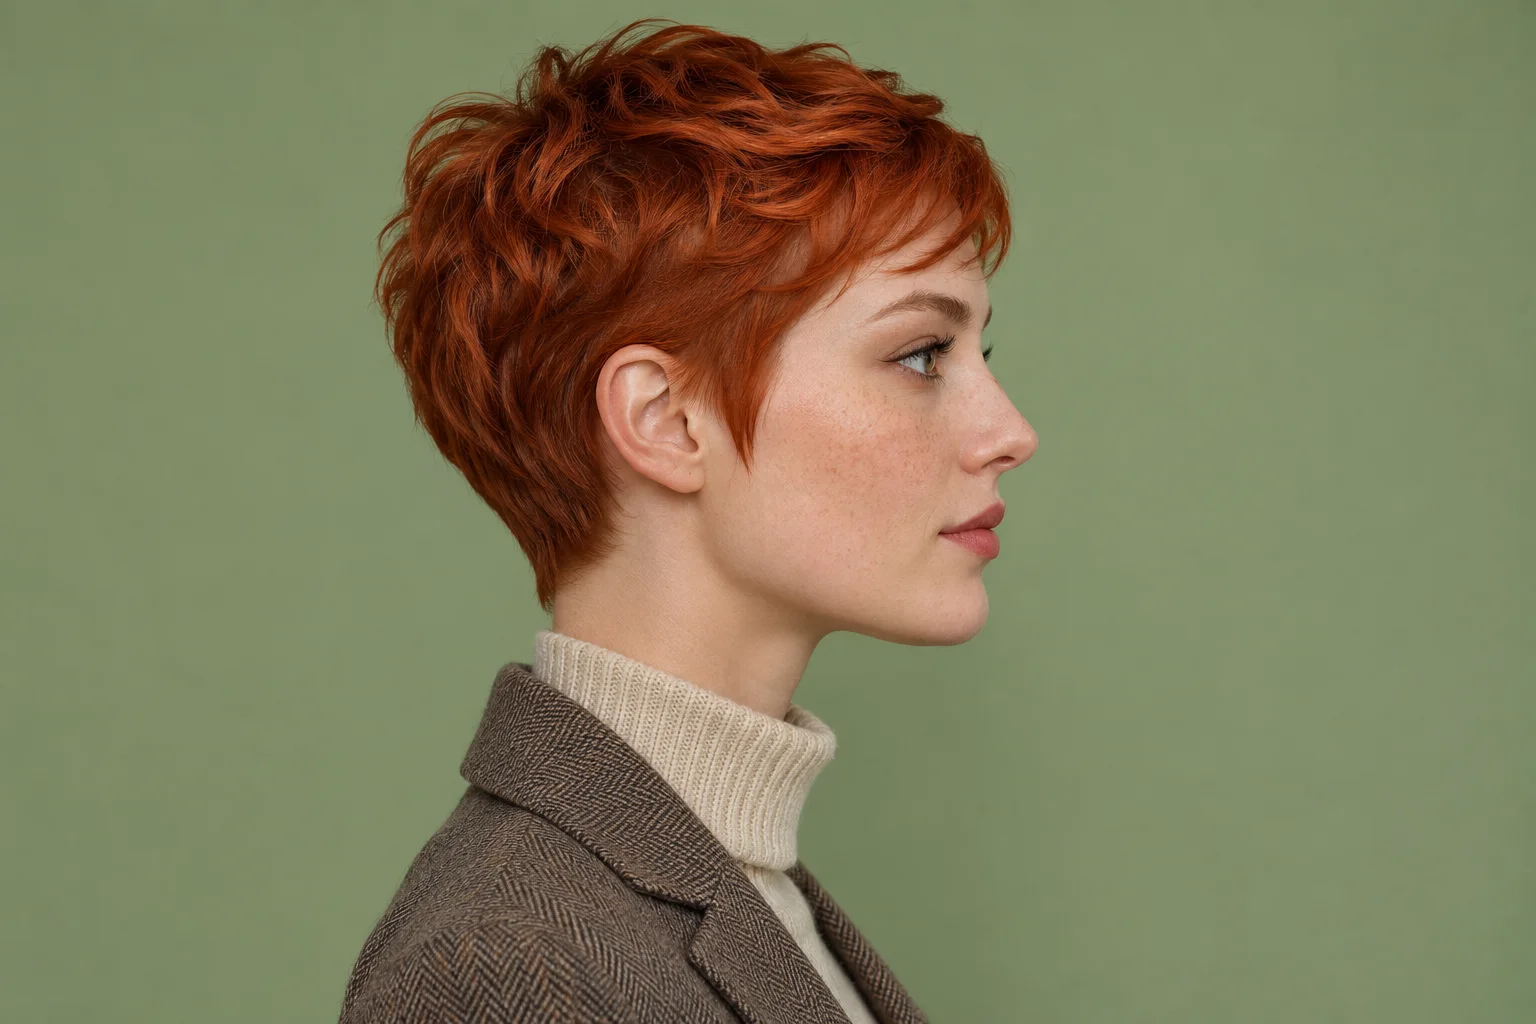
Read the dry hair on both sides
Put your hair into its usual part and look at each temple separately. Gently press the section back, let go, and notice which direction it takes. One side may lie close to the face while the other curves toward the ear. Check again after turning your head. A line that looks smooth when you hold the hair flat can look fuller once the hair falls back into place. This matters most where the section needs to clear the ear.
With waves or curls, bring a dry photo from a day when you wore your natural texture. A small curl can take up most of the space between the temple and the ear, depending on where it bends. Point to the tip you see after it has settled. With fine straight hair, look at how much density reaches the ends. You may like a slim pointed piece on one side and a slightly fuller edge on the side where the hairline is sparse.
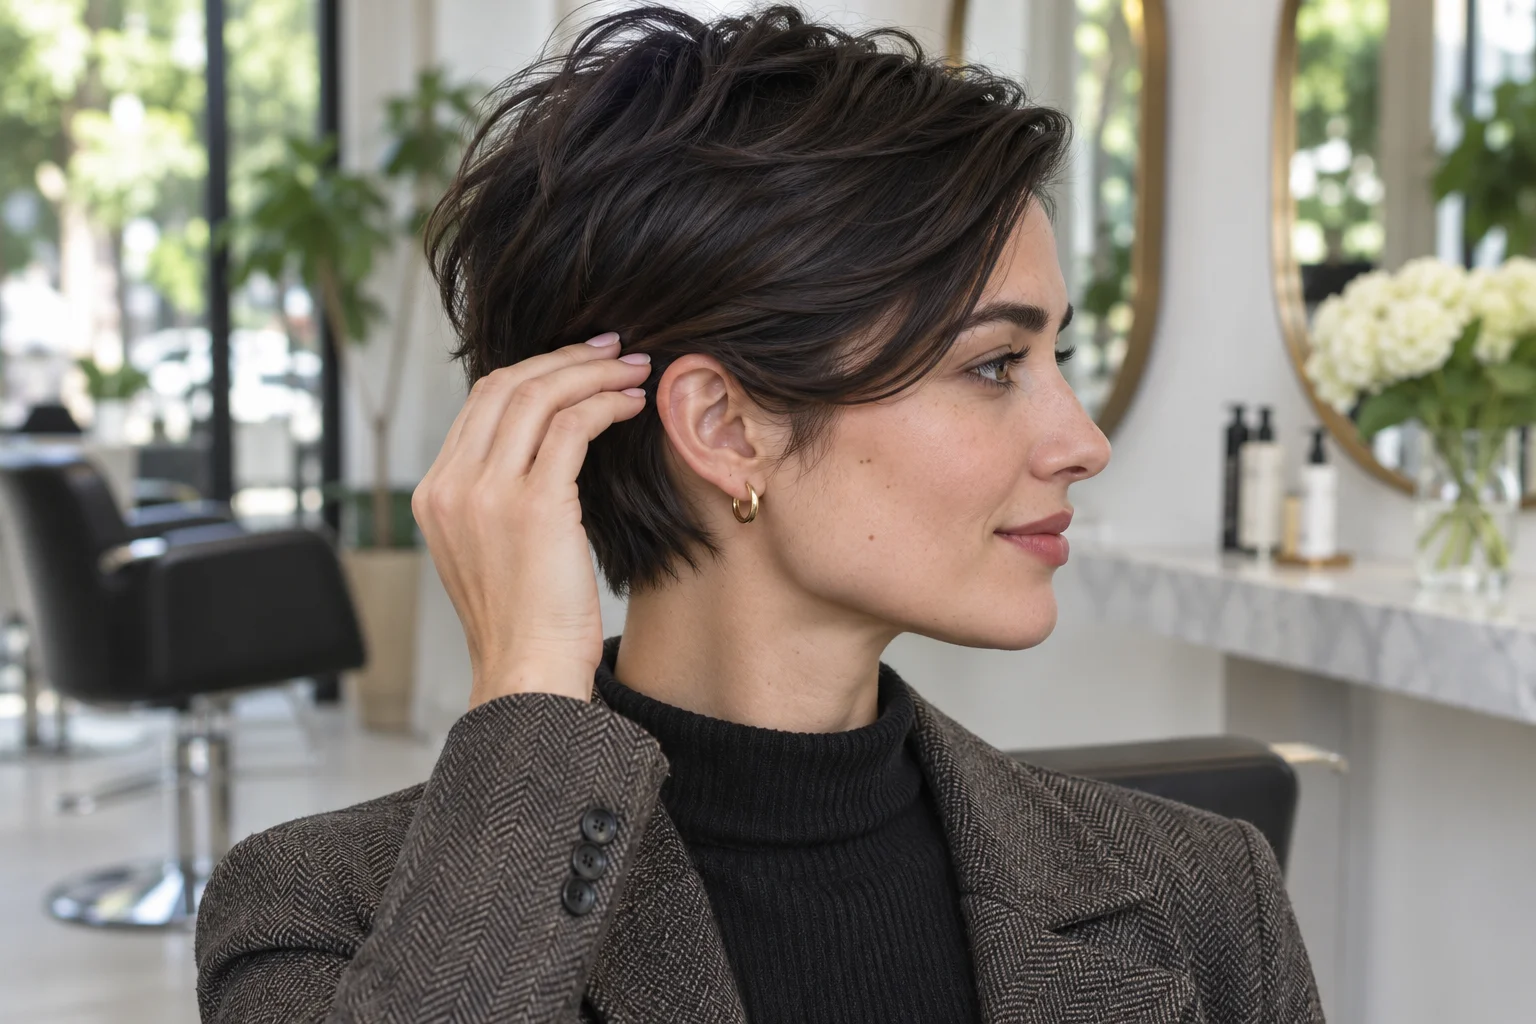
Try a short silhouette on the same selfie
Use Hair Muse to preview short hairstyle directions on one selfie. Take the picture in even daylight with your face upright and the temple area visible. If long hair hides the ear in the photo, gather it loosely before taking the picture so the overall change is easier to read. Compare at the same size. Decide whether you like a close shape at the temples or some additional length beside the cheeks. Write the preference in a few words you can use again in the salon.
Put the selfie next to a real side photograph and check your own landmarks. If you liked the compact look, mark the amount of upper ear you want to see on the profile. If you preferred more framing, mark where the visible point could finish. The selfie comparison helps you decide on the overall shape. The side photograph gives the stylist something more concrete to discuss with you while looking at your dry hair.
Hair Muse on the App Store · Take a clear photo for a hairstyle preview
Test the contour with your everyday accessories
Take your usual earrings, glasses or earbuds to the mirror. If you wear a stud, see whether your favorite side shape leaves it visible from the front as well as the side. With a hoop, move your head and see whether the longer piece brushes the clasp or falls into the hoop. With glasses, put them on after releasing the hair from behind the ear. Watch what happens where the arm runs over the top of the ear. You might like how the short piece sits in front while the upper part remains clear.
If you use over-ear headphones at work, see what happens when you take them off. Hair that was flat at the temple may lift or shift under the band. Use your fingers to guide it back and decide whether that is a quick adjustment you would make every day. For a longer version, test the tuck with the headphones or glasses in place. If the space behind the ear feels crowded, consider a tapered point in front and a cleaner opening above.
Give your stylist a request they can check in the mirror
Try “I want the top of my ear visible, with a little point ending near the middle of the ear. I like some movement at the top. Can we check the front piece dry and leave it a little longer on the first pass?” If you want to tuck, show the movement you make at home. Ask the stylist to hold the section where they expect it to finish, then show you both sides. Use the closest reference for the ear opening and your own hair for the final length decision.
Agree on which side you want to treat as the main reference if they grow differently. A small adjustment on each side can give a similar look from the front. Ask how the outline will change as the piece grows. If keeping the ear clear matters to you, find out which detail usually needs attention first. If you are comfortable letting it soften, ask what you can do with the piece as it gets longer, such as brushing it forward or starting to tuck it.
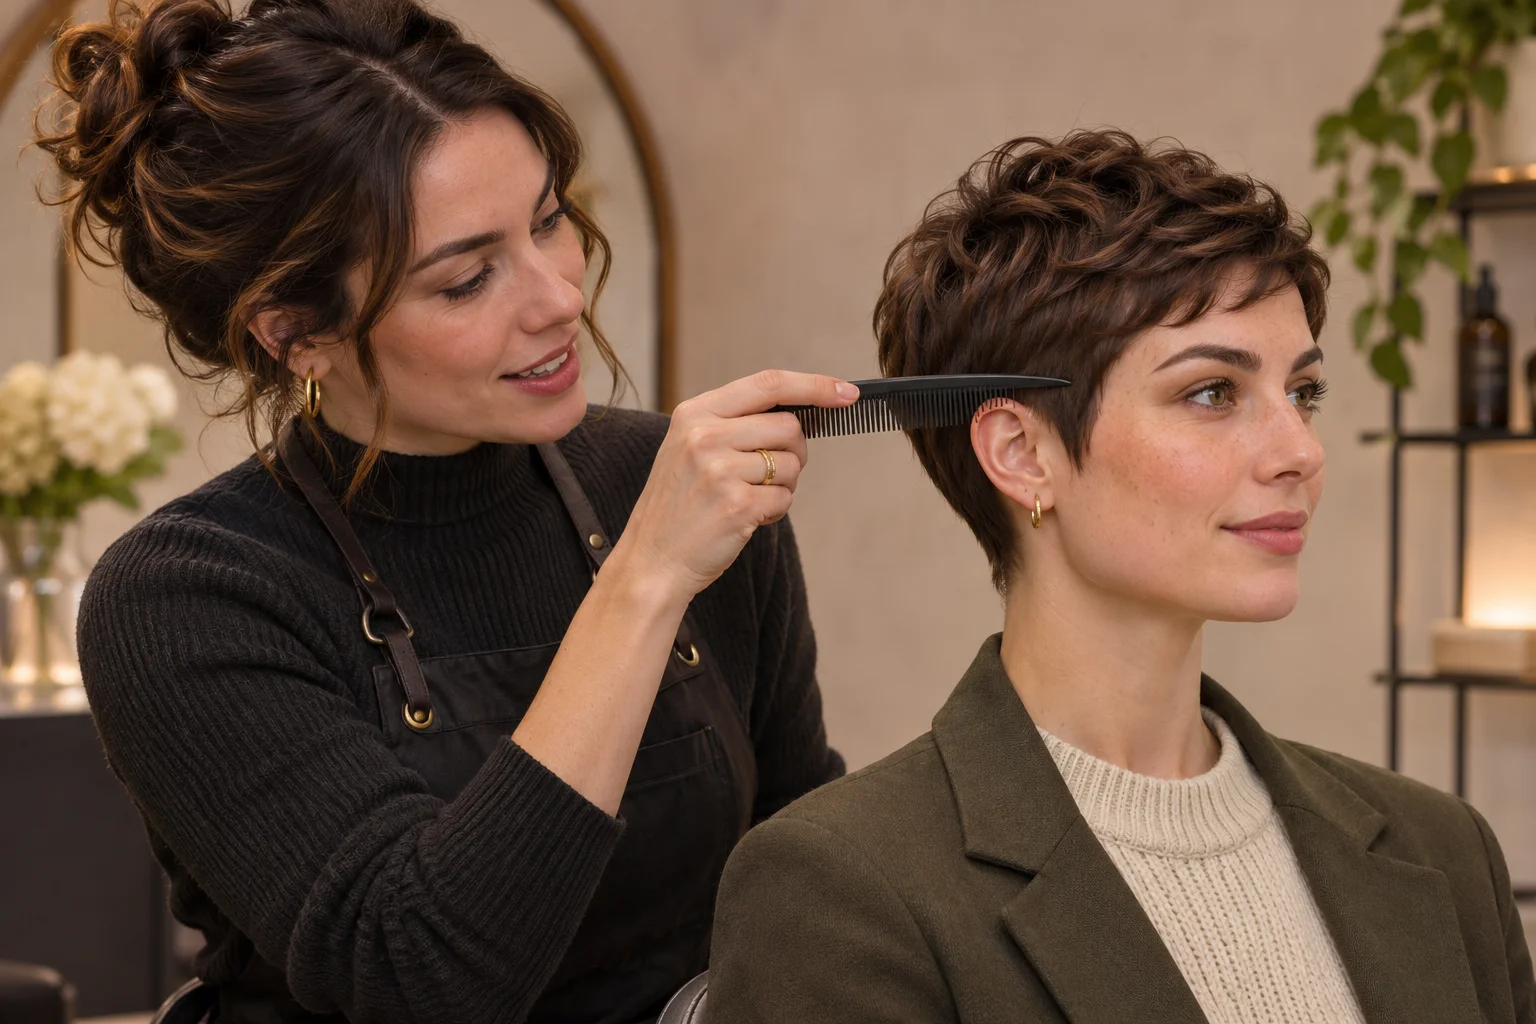
Check the result in three positions
Look straight ahead first. Notice where the side sections sit in relation to the cheek and whether they pull your attention away from the shape you liked at the top. Then turn your head to see the upper ear and the tip of each sideburn. Finally, lower your chin slightly and move it back up. This can reveal a short piece that lands differently once the hair moves. If you see one detail you want to change, point to that exact spot while the hair is dry.
Keep a front and side photo when you like the finished length. For your next appointment, compare them with a new photo from the same angle. If your main concern is a fold above the ear, bring that image and show where the hair starts to turn. If the point in front of the ear still looks right, say you want to keep its length. A record of your own cut can make the next conversation easier than choosing a completely new set of references.
Questions
Can I leave pixie cut sideburns long and keep the ear open?
Yes. You can keep a pointed section in front and ask for the upper rim of the ear to show. Check both details in profile because a section that looks narrow from the front can partly cover the ear from the side.
What if my two sides grow in different directions?
Ask for a dry check on both sides. Compare where the ends land when you release the hair. The stylist can account for the direction on each side while aiming for a similar visual balance.
How do I know if my pixie side can tuck?
Ask the stylist to hold the dry section at the proposed length. Test whether it reaches behind the ear without pulling it tight. Let go, move your head and check again with anything you normally wear over the ear.
Which photo should I take to my appointment?
Bring a profile where the ear opening and the hair directly in front of it are easy to see. Use a second front photo to explain how close or full you want the overall shape at the temples.